Welcome to the On-line User's Guide for your 3dfx Voodoo3 3500 TV accelerator card! Use this Guide to learn about the advanced features of your new card, how to select the display settings you want, and other tips and tricks for getting the most from your Voodoo3 card. Select from the options listed below and the items on the menu at the left for more information.
NOTE: To return to this page later, simply click on the "Voodoo eyes" on the menu at the left.
Windows 95 or 98
| Detailed Instructions - Windows 95 or 98 | Top |
How to remove display utilities or control panels for your display card:
To remove the display utilities or control panels for a display card you are currently using, you must first locate and identify them. There are four main places where you should look for these items:
| How to open the Windows Control Panel: | Top |
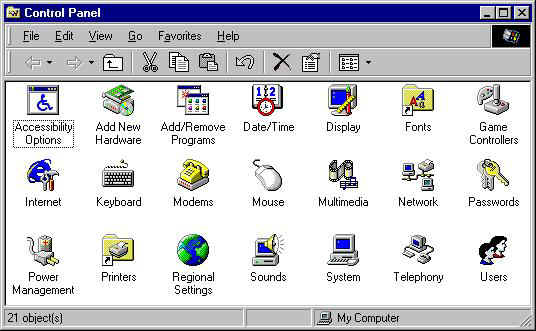
The Control Panel typically contains the standard arrangement of icons shown in the diagram below, as well as any additional icons for programs, utilities, or control panels that may have been installed by other programs or devices. Please notice that the icons in your Control Panel may be different from the ones shown here, depending on the Windows options and other software you have installed. Also, the "Display" item shown opens the standard Windows "Display Properties" dialog box and you should not try to remove it from the Windows Control Panel.
The typical arrangement of icons in the Windows Control Panel
Examine the icons in your Control Panel for any display utilities or controls that were installed along with the card you are about to remove from your computer. When you remove or uninstall the software for the current display card, you may be prompted to restart your system. Please do so before you continue.
One of the items shown in the Windows Control Panel is called "Add/Remove Programs". Double-click on the icon to open the "Add/Remove Programs" dialog box. Scroll through the list of programs in that dialog box to identify any display utilities like 3dfx Tools. Select the program you want to remove and click on the "Add/Remove..." button. Follow the on-screen instructions to complete the process.
| How to select the standard VGA display driver: | Top |
In Windows 98...
In Windows 95...
| How to open the Display Properties dialog box | Top |
There are several methods available for opening the Display Properties dialog box:
| How to select the display settings you want | Top |
- Click on the "Apply" button to activate the selections you have made without closing the Display Properties dialog box.
- Click on the "OK" button to activate the selections and close the dialog box.
- Select "Cancel" to close the dialog box discarding any changes you have made there.
| How to configure your 3dfx Tools options | Top |
When you have opened the "Display Properties" dialog box, select the "Settings" tab and then click on the "Advanced…" button to open the Voodoo3 Properties dialog box.
There will be some new tabs in this dialog box to support the options of your Voodoo3 3500 TV card:
There will also be a new 3dfx Tools Control Panel icon in your Windows Control Panel.
![]()
| 3dfx Info | Top |
Select the "3dfx Info" tab to open the "3dfx Info" page, shown here…
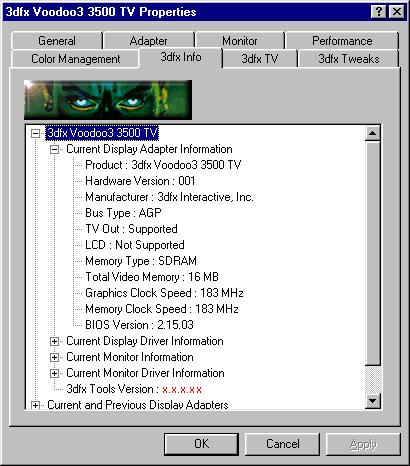
NOTE: The "x.x.x.xx" shown in the above example would be replaced with the actual version number of your 3dfx Tools software.
Click on the small "+" to the left of an entry to view the details for that item. The information available for your Voodoo3 card includes:
The version of the 3dfx Tools software that you are currently using is also shown here. The last two items listed give you access to information about the current and previous display adapters and monitors you have used with your system.
| 3dfx TV | Top |
Select the "3dfx TV" tab to open the "3dfx TV" page, shown here...
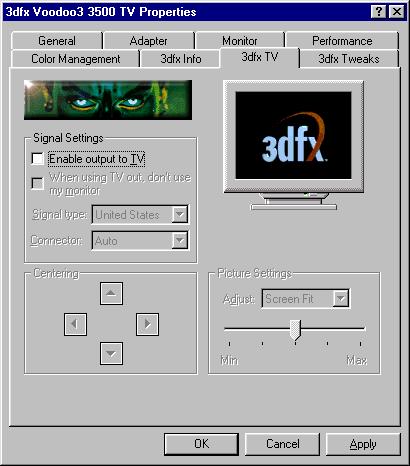
The "3dfx TV" page of the Voodoo3 Properties dialog box
Place a check in the "Enable output to TV" checkbox to activate the TV output option for your Voodoo3 card. This will also make the controls in the "Centering" and "Settings" sections of the page available. Use the "Signal type:" selection box to choose the TV output format that is appropriate to your local video standards. The NTSC signal format is the video standard throughout North America and the PAL signal format is the primary video standard for most of Europe.
If you would like for the display output from your computer to appear only on the TV screen and not on your computer's monitor, then place a check in the checkbox labeled "When using TV output, don't use my monitor" to disable your Voodoo3 card's SVGA output while using the TV output option.
Use the controls in the "Centering" section of the page to adjust the placement of the computer's display on your TV screen. These adjustments will only affect the placement of the display on your TV screen, not on your SVGA monitor.
The drop-down selection box in the "Settings" section at the lower right of the page allows you to use the slider control there to adjust several different TV output options to find the best match for your TV's capabilities:
NOTE: To use the Voodoo3 3500 TV card's TV output you must connect a television to one of the Video Output Connectors on the Custom I/O Pod attached to the included Custom I/O Cable.
| 3dfx Tweaks | Top |
Select the "3dfx Tweaks" tab to open the "3dfx Tweaks" page, shown here…

NOTE: Changing the settings on the "3dfx Tweaks" page could affect the visual quality or display performance of your Voodoo3 card with some software. You should only make changes to these settings if you are sure they are necessary for the proper functioning of the software you are using.
Gamma Settings
The controls in the "Gamma Settings" group allow you to increase or decrease the color brightness levels of your display. If your display seems too dark or too bright, move the Gamma slider controls to the left to decrease the Gamma levels or to the right to increase the Gamma levels. If you need to adjust the relative color levels for your display, then remove the check from the "Lock Gamma" slider controls to move the Gamma slider controls for each color separately (R = Red, G = Green, B = Blue). The default Gamma Setting is 1.00 for each color.
You can adjust the Gamma settings for your Windows Desktop itself, or you can separately adjust the Gamma settings to use for your Direct3D or Glide/OpenGL applications. Please note that any Gamma adjustments you select for your Direct3D or Glide/OpenGL applications will only be used when such programs are running in full-screen mode. Direct3D or Glide/OpenGL applications running in a window on your Desktop will use your Desktop Gamma settings.
Selection
The three options in the "Selection" group allow you to choose which set of the Voodoo3 card's features you want to change. When the "Desktop" option is selected, you can change the Voodoo3 card's Gamma Settings for your Windows desktop environment itself. Please note that this option only affects the non-3D functions of Microsoft's DirectX.
Direct3D
This option allows you to change the Voodoo3 card's Gamma Settings for your Direct3D applications, and to change the video overlay option in the "D3D / DirectDraw" section.
Glide / OpenGL
Select this option to change the Gamma Settings for your Glide and OpenGL applications, and to change any of the options in the "Glide / OpenGL" group of controls:
Disable the splash screen - Place a check in this checkbox to disable the Glide splash screen.
Force mipmap dithering - Place a check in this checkbox to enable texture mipmap dithering. This may improve the visual quality of some applications, but it may also decrease the rendering performance of your Voodoo3 card.
Limit texture memory to 2MB - Place a check in this checkbox to reserve two megabytes of texture memory for the texture mapping unit in a Glide application. Some Glide games may not work properly unless this option is selected.
Force triple buffering - Place a check in this checkbox to enable triple buffering if the Glide application has enough frame buffer memory available to support it. This may improve the rendering performance of your Voodoo3 card in some Glide applications, but all Glide applications are not compatible with triple buffering and may produce unusual display "artifacts" if this option is selected.
Reset to Previous
Click this button to undo any changes you have made to the options for the current selection (Desktop, Direct3D, or Glide / OpenGL).
Factory Defaults
Click this button to restore the original factory default values for the currently selected option.
| The 3dfx Tools Control Panel | Top |
To disable any of the 3dfx Tools and remove the corresponding 3dfx Tools page from the "Voodoo3 Properties" dialog box, simply open the Windows "Control Panel" and double-click on the "3dfx Tools" icon to open the "3dfx Tools" control panel, shown here…

Remove the check from the checkbox beside the option you wish to disable and click on the "Apply" button. To restore that option’s page to the "Voodoo3 Properties" dialog box and reactivate the option, simply place a check in the checkbox beside the option you wish to restore and click "Apply".